Last updated: 22 April 2026 | Change log
CSC is a Business Manager tool that enables you to manage Worldpay payment transactions directly from the Salesforce Commerce Cloud (SFCC) Business Manager interface. This functionality allows you to capture (settle), refund and cancel orders.
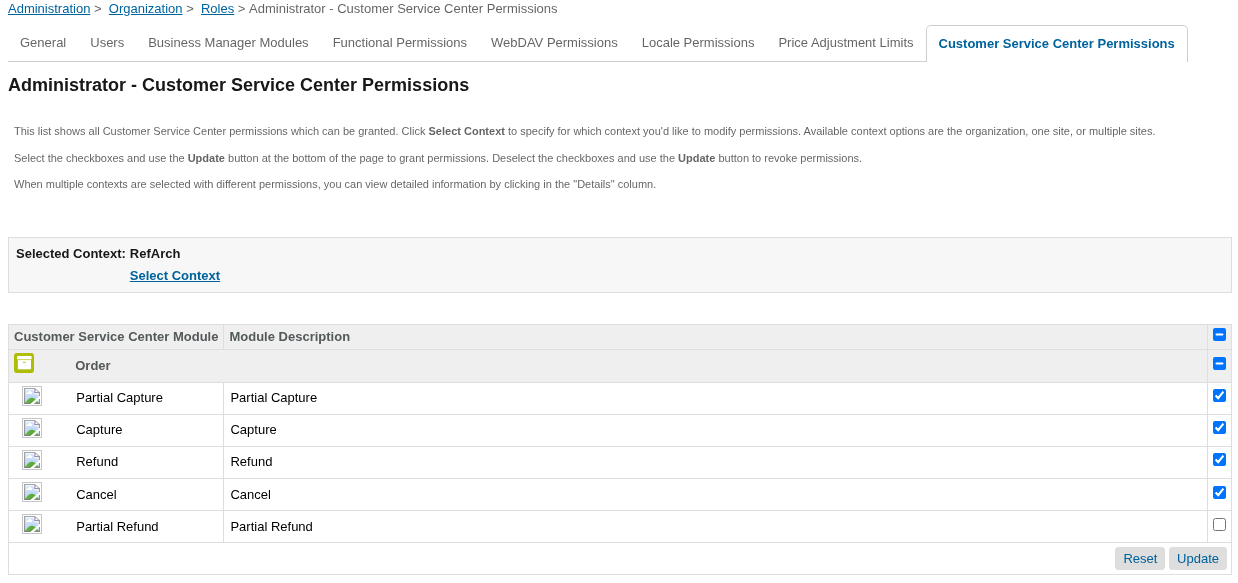
You can manage your orders from within the Customer Service Center by setting your permissions for each user as below.
Log into Business Manager and go to Administration → Organization → Roles & Permissions.
Click on the role (e.g. "Administrator") and then "Customer Service Center Permissions".
Select the context you are applying the permissions for and click "Apply".
Tick the permission boxes and click "Update".
If you use Salesforce's Order Management System service, the cancel action will only affect payments and not order updates . The OMS service must update the order and stock.
You can set whether SFCC updates the order automatically following a post-transaction action in CSC or whether you prefer to control this using the Salesforce OMS service.
Go to Administration → Organization → Roles and Permissions → Customer Service Center and choose one of the following:
AWPCore_UseOMS = false→ SFCC updates the orderAWPCore_UseOMS = true→ Only the payment is updated; your Salesforce OMS service handles the order
You can receive order status updates in CSC.
To enable this, contact your Worldpay Implementation Manager to set up a webhook through our Events service.
SFCC differentiates between the status of an order and the status of a payment.
Occasionally, the payment status for an order isn’t recognized by SFCC due to technical issues (e.g. connectivity problems). In this event, the order status might show as unsuccessful initially but may later be updated according to the payment status we return.
Check your order status after you are sure your scheduled order notification job has returned the payment status from us. At this point you will see the updated status of the order.
| Initial order status | Updated status |
|---|---|
NEW or OPEN or COMPLETED | Always NEW - payment has been authorized. You can capture/settle the order |
FAILED | Can be:
|
CANCELLED | Can be:
|
CREATED | Can be:
|
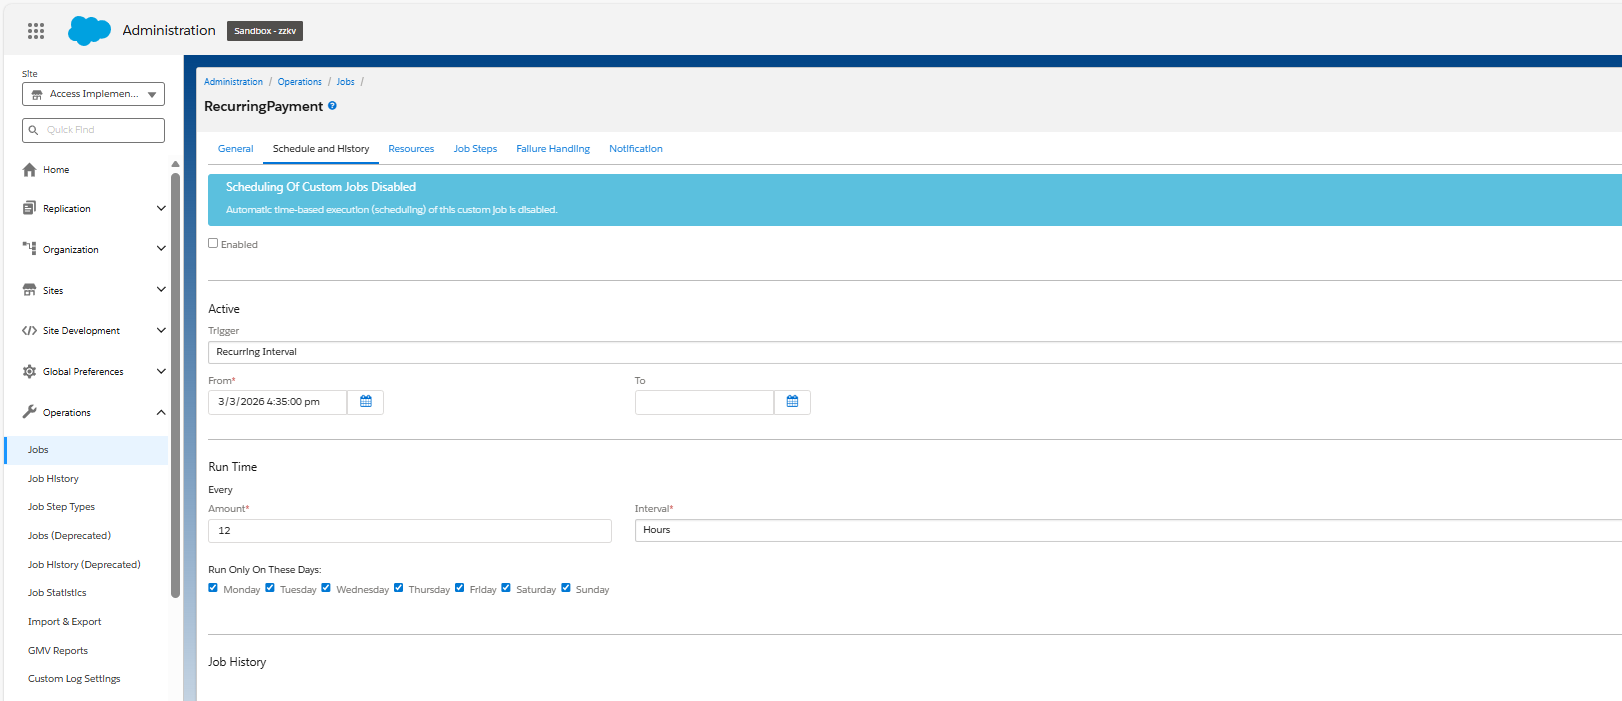
A recurring payment job runs on a daily basis for subscription orders. You can customize the frequency of this job based on your requirements.
To do this:
Go to Administration → Operations → Jobs and click on "RecurringPayment".
Update the run time interval under the "Schedule and History" tab.
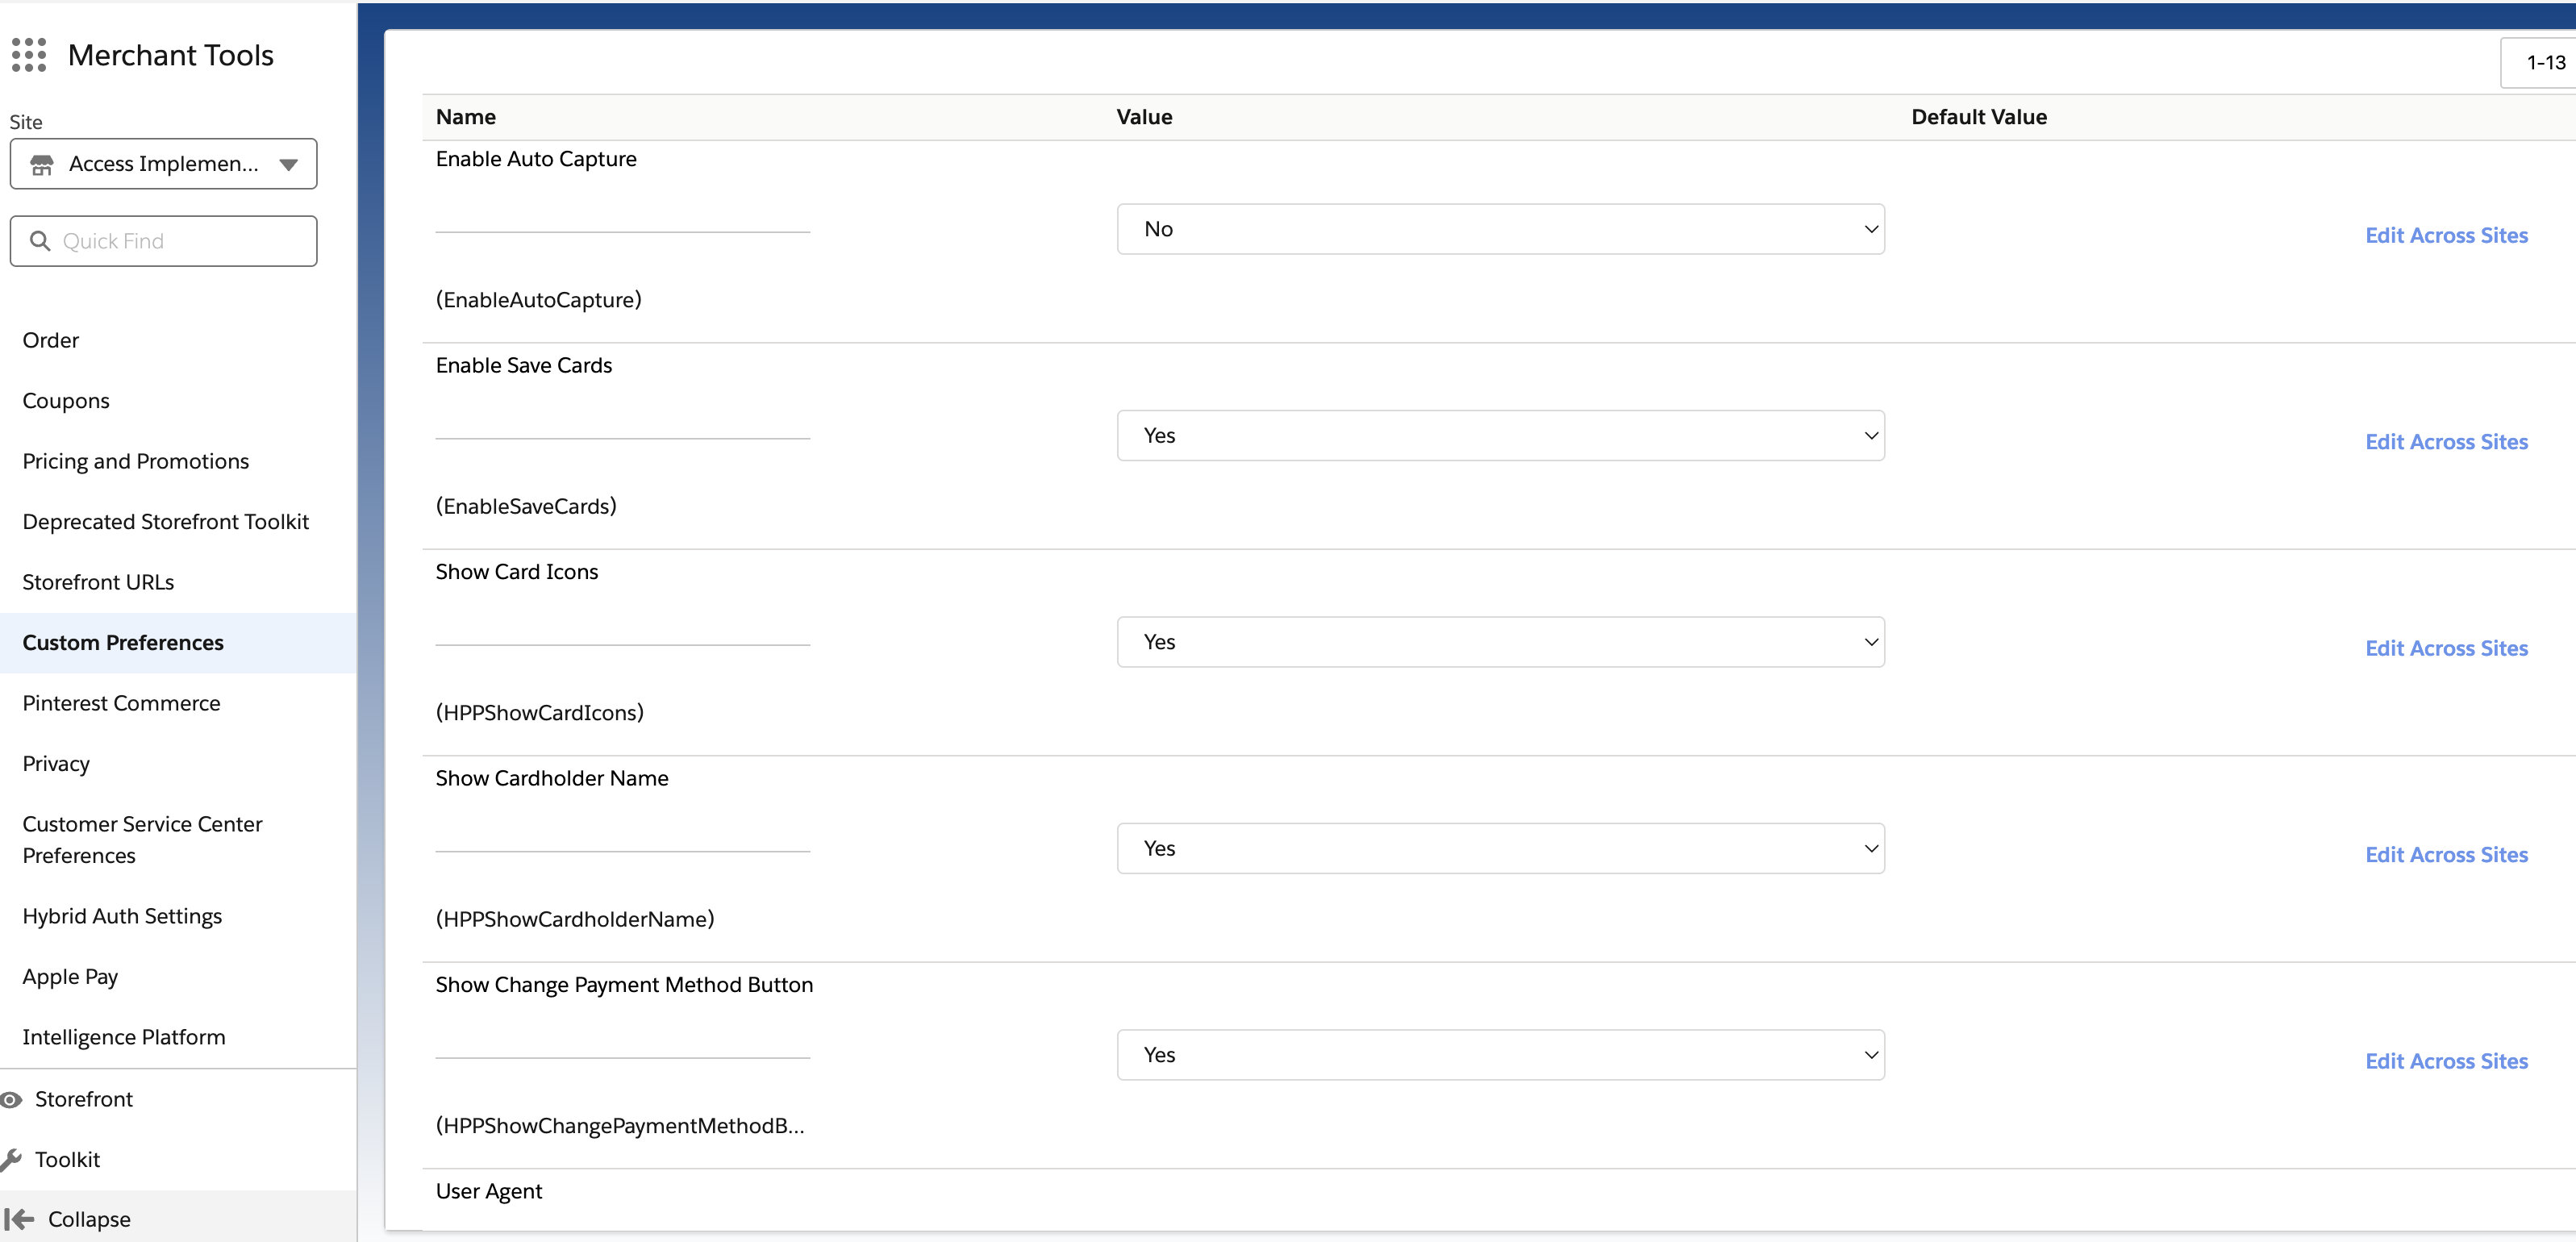
You can choose to display or hide certain fields for your customer within Business Manager.
Depending on your requirements, you can also enable/disable auto capture for orders and set whether your customer can save cards on their account.
To do this:
Go to Merchant Tools → Site Preferences → Site Custom Preferences and click on "AWP-Core".
Select "Yes" or "No" for each field or functionality.
For more information about enabling the save a card functionality, visit our Storing your customer's card details section.
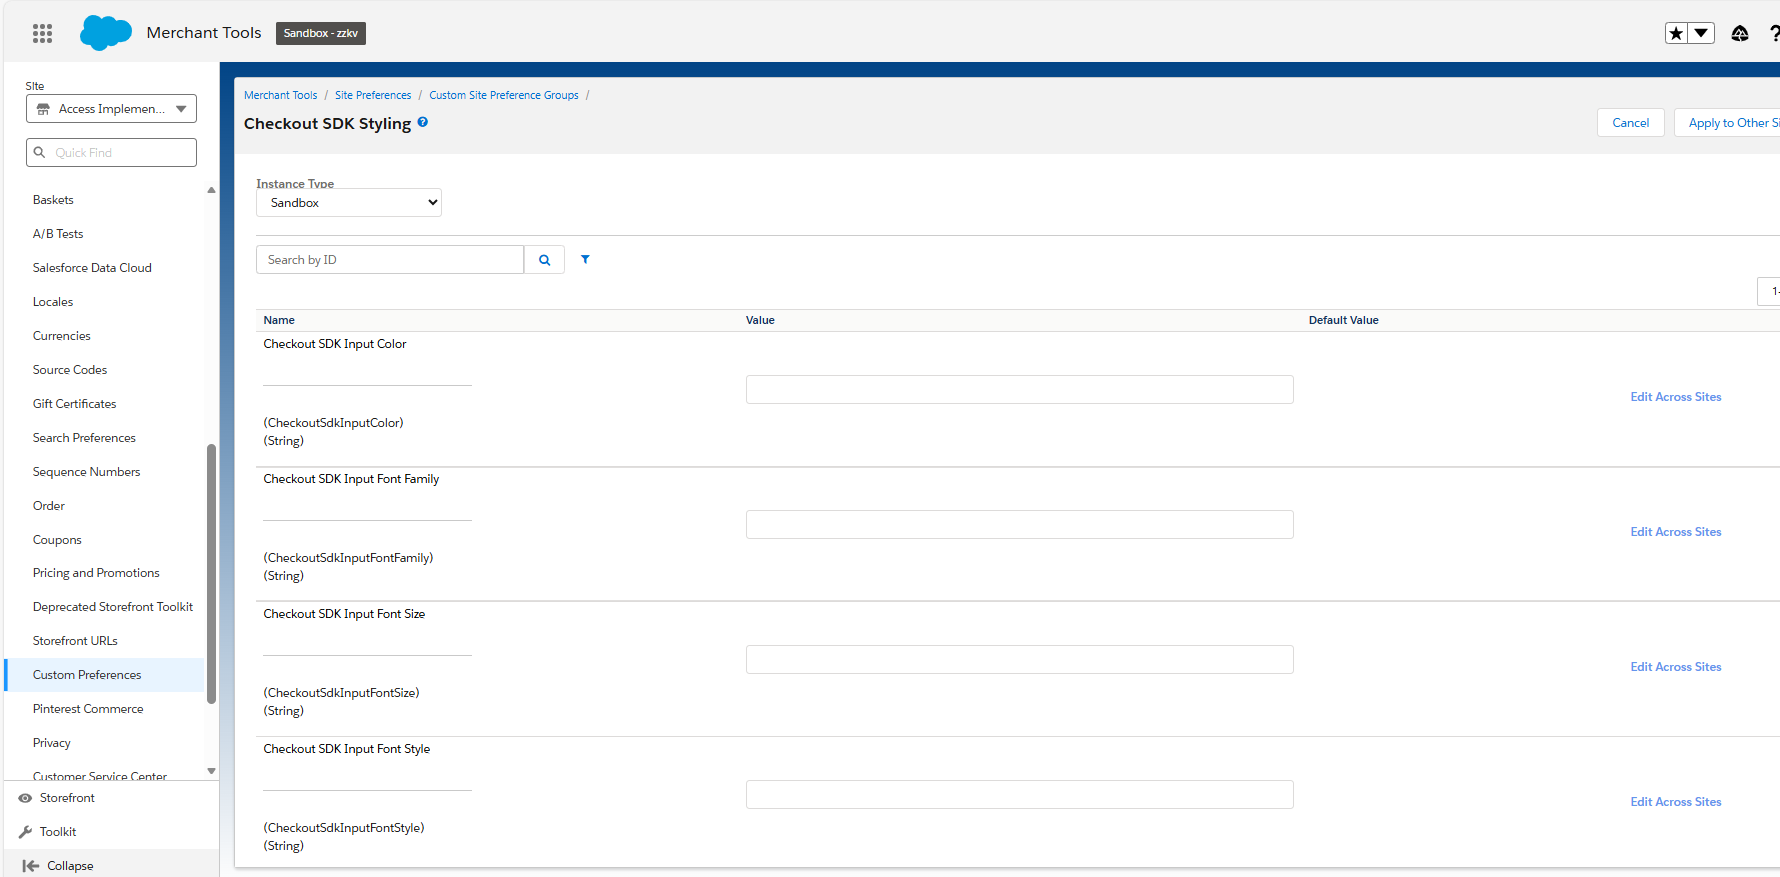
If your Plugin is integrated to our Checkout SDK, you can customize the card fields that you display to your customer.
To do this:
- Go to Merchant Tools → Site Preferences → Site Custom Preferences and click on "Checkout SDK Styling".
- You can customize Checkout SDK fields including input color, input font style, and input font size.
You can see the range of fonts available on our Checkout Web SDK styles page.
Next steps
Test and go live
Manage your orders
View your customer's journey